The technique is called 'Stacking' which is where multiple, single images are placed on top of each other to create a final image consisting of many photos shot at the same location.
Things to remember when stacking images are:
- Do a test shot initially to work out the ISO number, shutter speed and aperture required for a correctly exposed photograph
- Remember not to change the composition during the photo shoot, as any movement will cause the stacking technique to fail and overlap incorrectly
- At some point during the capture, a double timed photograph needs to be taken (so in a collection of 4 minute exposures, an 8 minute exposure) to give the foreground subject more illumination.
Shooting the Photographs
Here's what he had to say about stacking as opposed to a single long exposure image:
A set of exposures that can be composited together to create an interesting star trail image is not always the easiest thing to achieve. But the technique does have some potential benefits compared to a single very long exposure.
- A stacked composite image is less noisy than a single very long exposure.
- The effective exposure time possible with a single battery is extended by segmenting the exposure (see my comment about long exposure noise reduction below).
- Single captures that contain disturbing elements such as airplane trails or light from the photographer's headlamp can be eliminated from the stack if desired. In other words, stacking gives you granular control over the time slices.
The most important thing when attempting to photograph star trails for stacking, of course, is to find the right view. Ideally, the scene should be free of ambient light---this goes for moonlight, city light pollution, and car headlights. Since my star trail images include a landscape in the foreground, I like to find a location in which the general scene (and not only the night sky) is interesting. To get the effect of circular star trails, your camera should be pointed north. Polaris, the North Star, will be stationary in the center of circular moving stars.
In addition, the wider the angle of the lens you use the greater the curvature effect in the star trails. I exclusively use extreme wide angle lenses for these images, most of the time my 10.5mm digital fisheye lens. The trick to exposing the multiple images is to expose for the starlight itself. This means at ISO 100 each individual exposure should be about four minutes at f/4 or f/5.6.
Harold now goes into more depth about the shooting times for the technique:
If you stack 12 four minute exposure times you get a total elapsed time of about 48 minutes. To achieve this, you need a sturdy tripod and a programmable timer. In this example, you put the camera on manual exposure and Bulb. Next, set the time for 12 exposures, each of a duration of four minutes, with a four minute and one second interval between the start of each exposure.
One important point that Harold Makes here:
It's important to turn in-camera long exposure noise reduction off. As I noted earlier, this gains you battery life (and noise reduction for the four minute exposures wouldn't help you much with the star trail portions of the images)
After reading through the techniques used by Harold, I now want to customise the technique for the equipment available to me, so this next segment looks at how the photographs will be shot, specifically to my equipment:
Location
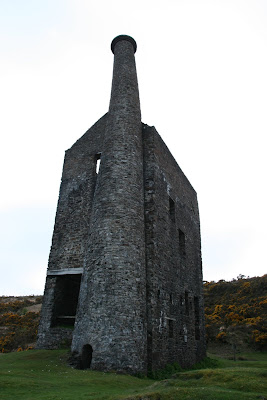
Choose appropriate location with good foreground interest which will rise up into the photograph and supplement the star trails. This could be a building or stone structure, maybe something on Dartmoor, but it just has to be clear of any ambient lighting or nearby towns or cities.
The location also needs to have a good view, from the South side, looking North as a location may be good from one angle but not the Southern angle, so this needs to be taken into consideration aswell.
Camera Setup

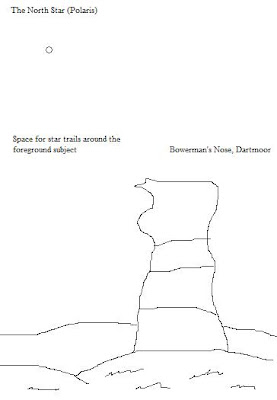
The camera will be setup on my tripod facing towards the subject, where the subject occupies around 1/3 to 1/2 of the lower part of the photo and the stars occupy the rest. Polaris needs to be positioned to one side of the subject to allow space for the trails to move around the foreground subject.
The example I drew on the right shows roughly how the composition should be, where the camera should be roatated to the portrait style and zoomed out to full wide angle to get as much in as possible.
The tripod needs to be as low as possible as I do not have a fish eye lens, fortunately my tripod is able to be lowered due to the flexing legs so I can get a lower angle on the subject.
I need to connect my remote shutter release to the camera and then choose my shoot settings:
Test shot
I need to do a test shot to gauge how much time it will take to correctly expose the star trails, so the settings are as follows:
Shutter speed: 4-5 minutes
ISO: 1600
Aperture: f4
This setup should give me a good idea as to how long to run the total exposure for when taking the photos for the image stack.
Okay so that is all the detail about setting my camera up for shooting, now all I need to do is go and shoot some more images ready to stack together...
Stacking in Photoshop
As for the technique when you get the pictures home, this is how to do it quickly and efficiently with the statistics tool in photoshop.
Harold Describes how the different stacking techniques affect the final photo produced:
Within the Photoshop Statistics script, the default setting, Mean, produced some kind of average sampling, not a very striking result. Standard deviation was interesting, but not ultimately satisfying. Range was good, but Maximum was best. My assumption is that this blended in the maximum value for every sampled point, so it makes sense that it produced the brightest star trails
Below I have described a step by step process for the stacking of images:
- Firstly open Photoshop, then once opened move the cursor to File> Scripts
- Then over to Statistics on the pop out menu
- A dialog box will appear, in the top scroll down list, choose 'Maximum' for the Stack Mode
- Click 'Browse' to choose the images to be blended into the single photograph (RAW images or JPGs can be used for this)
- Click OK then wait until the process completes


